ESP32-S3 Development Board
fishychair / August 2023
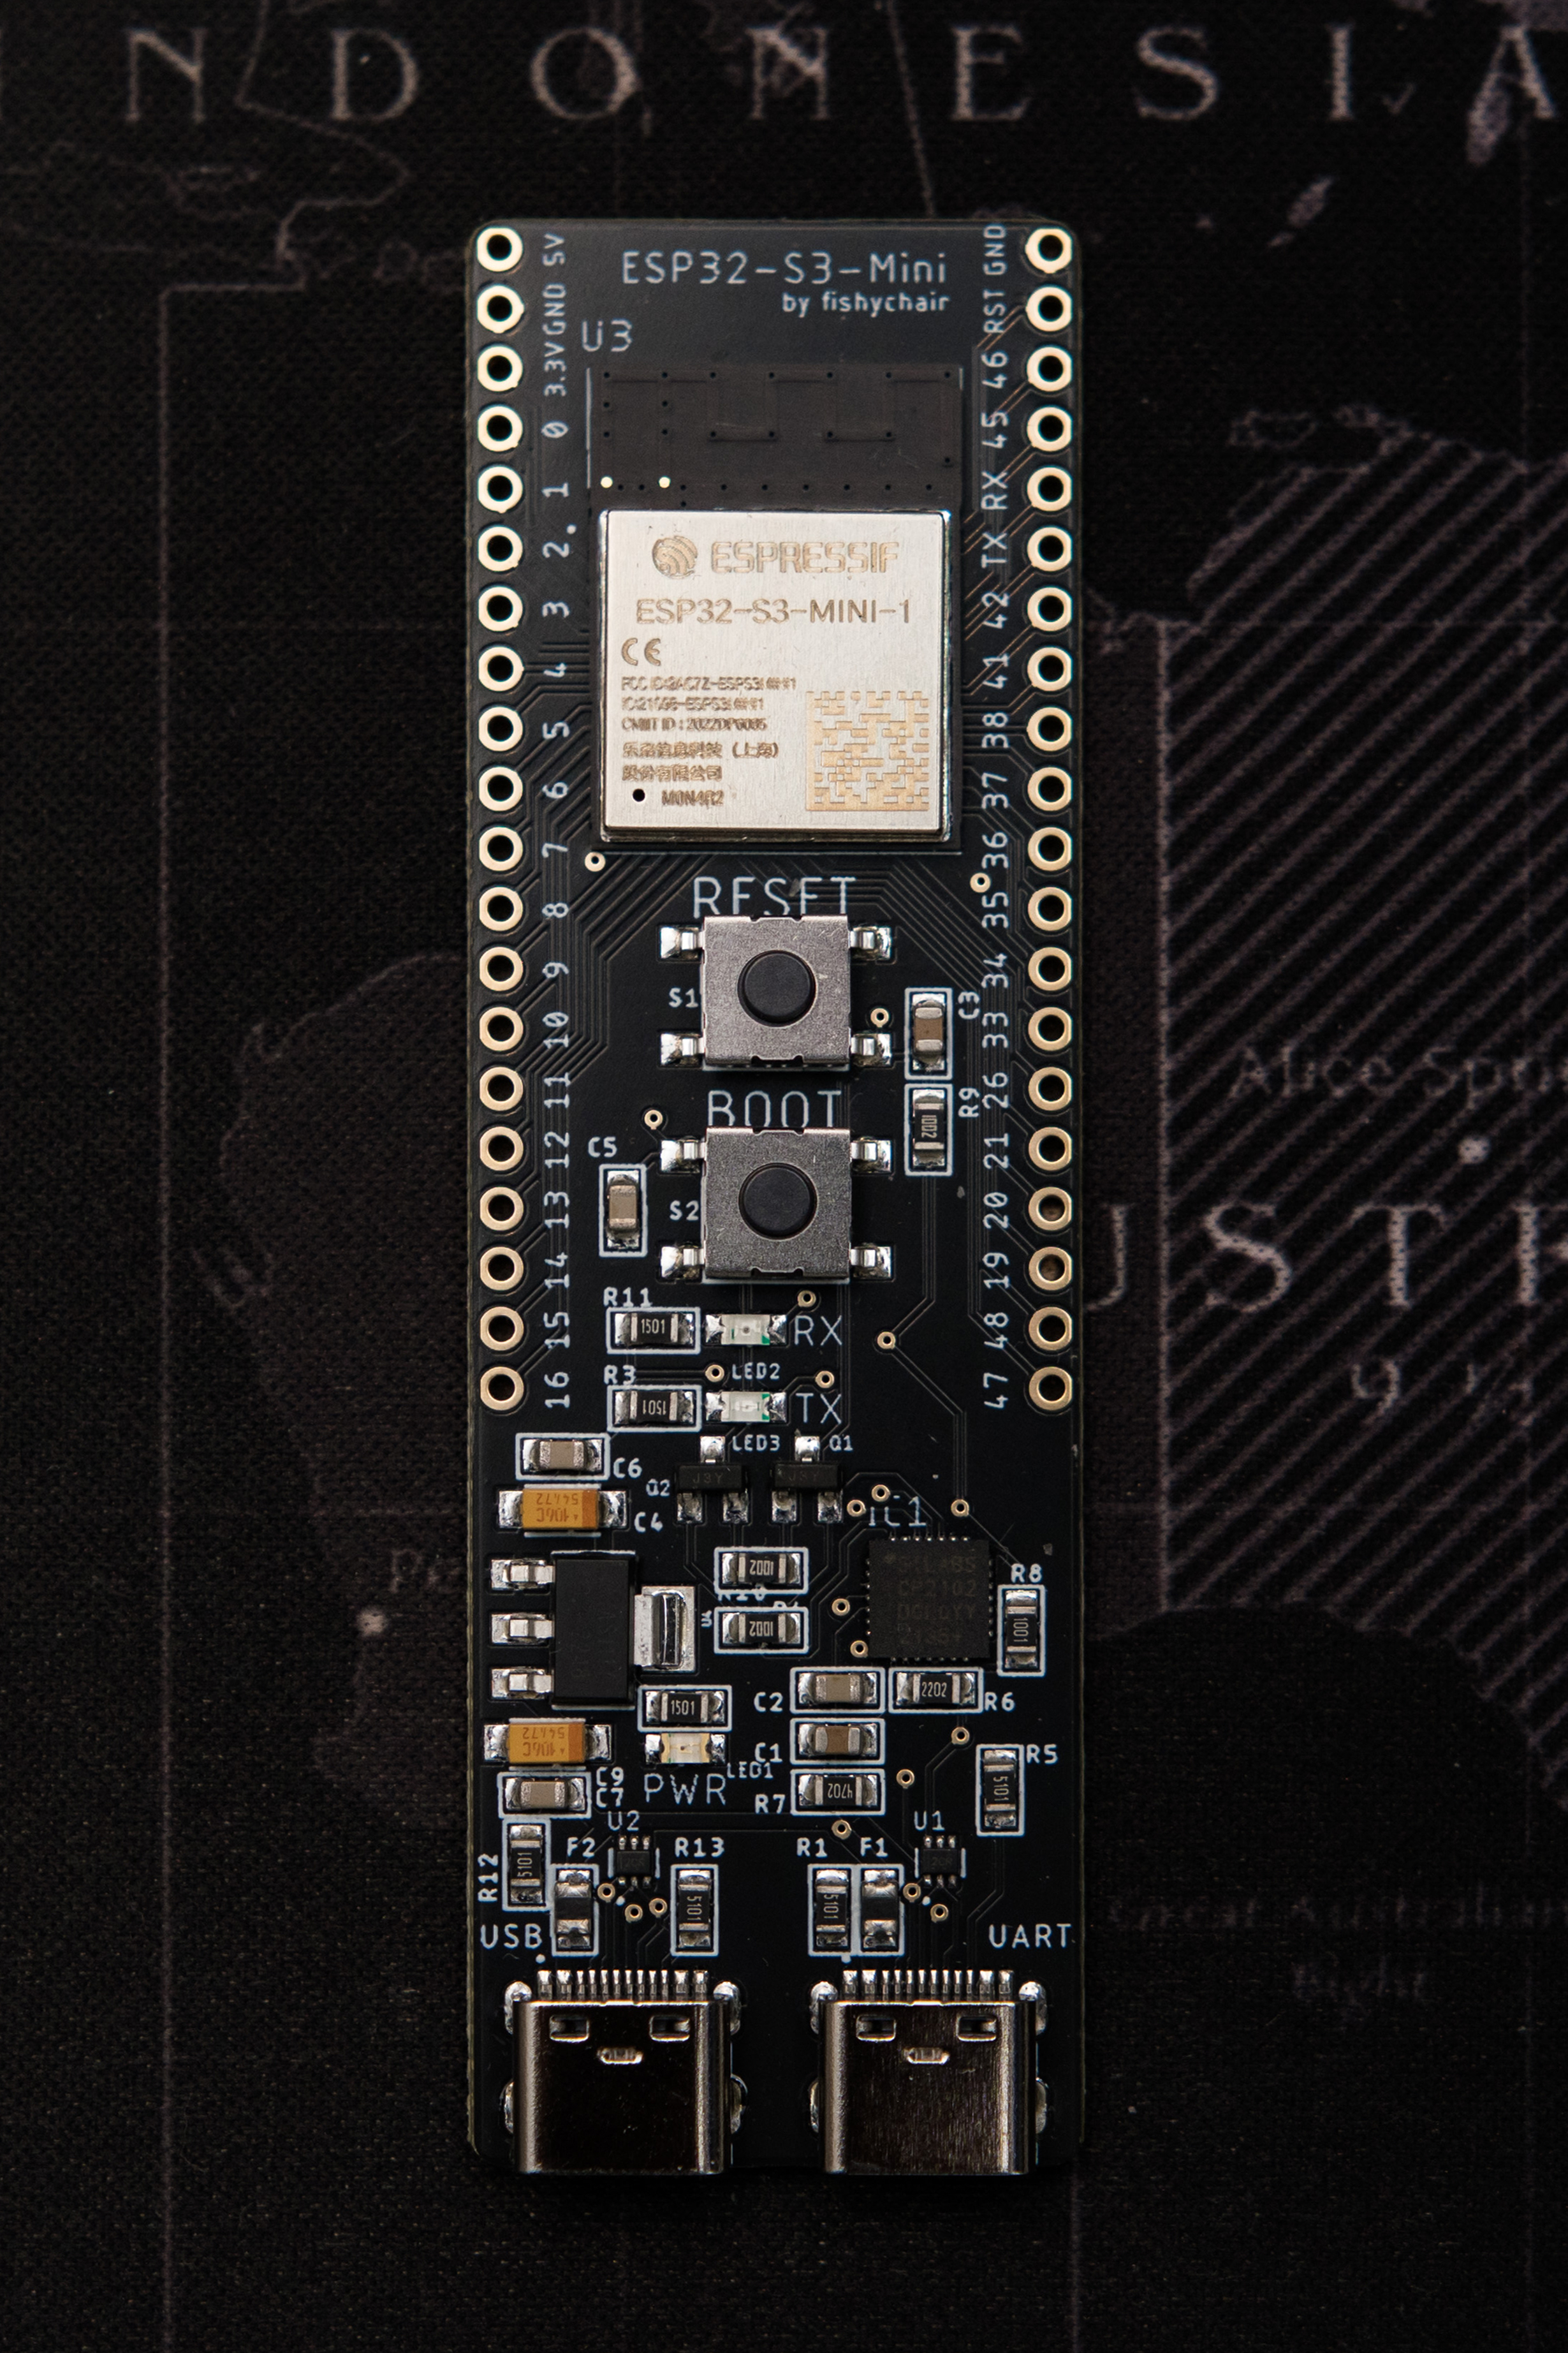
The ESP32-S3 development board is a powerful and versatile platform ideal for IoT (Internet of Things) and embedded development. It is based on the ESP32-S3-MINI-N4R2 SoC which houses a dual-core Xtensa LX7 microcontroller running at up to 240MHz. The SoC also includes a number of other features, such as:
- 2.4 GHz Wi-Fi and Bluetooth 5 (BLE)
- 2MB PSRAM
- 4MB flash
- 33 accessible GPIO pins
- USB HID capability
- Dual USB-C ports (1×UART, 1×USB)
- ESD and overcurrent protection (1.5A)
- 2×12-bit ADC muxed over 20 GPIO pins

What can you do with this board?
Development boards interact with the environment around them by collecting data from connected sensors and controlling anything from lights to motors.
Since this board has WiFi and Bluetooth capabilities, you can even pull data from sites or smart home devices and control/display that data accordingly. You can even have the ESP32-S3 development board emulate keystrokes or mouse movements.
How do you tell it what to do?
You can tell the ESP32-S3 development board how to respond to inputs by coding it with the Arduino IDE. The code is very simple to start with and is extremely beginner friendly.
Getting Started
The dev board can be programmed using the Arduino IDE with the ESP32 board library installed. Advanced users can opt to use Platform IO instead.
Step 1: Installing Arduino IDE
Install Arduino IDE from the link below. IDE 2.x has not been tested, I personally use IDE 1.8 legacy.
Arduino IDE downloadStep 2: Installing ESP32 package
Copy this text below:
https://espressif.github.io/arduino-esp32/package_esp32_index.json;
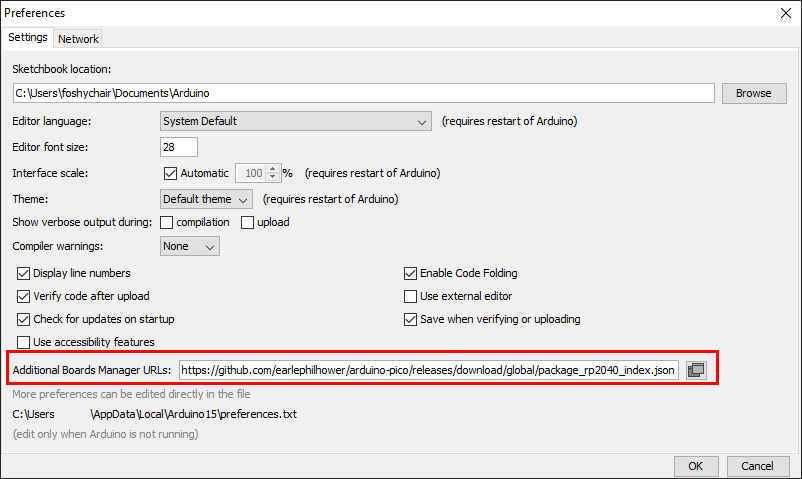
Start Arduino IDE and go to File > Preferences.
Paste it in the "Additional Boards Manager URL" text box as shown below.

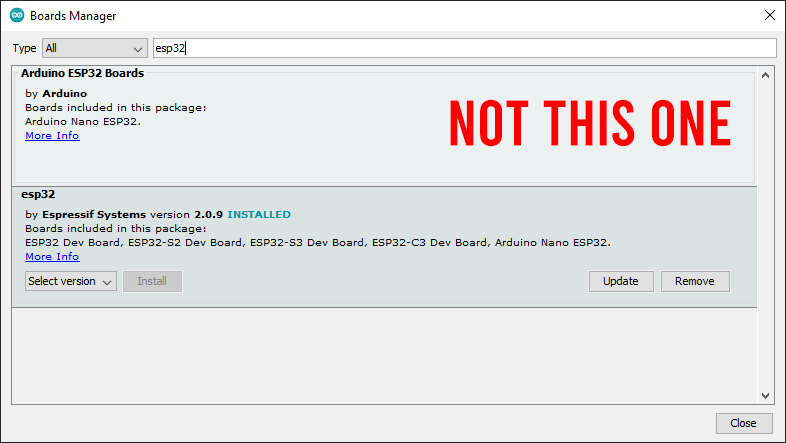
In Tools > Board > Board Manager, search for "esp32" and install the one by Espressif Systems as shown below.

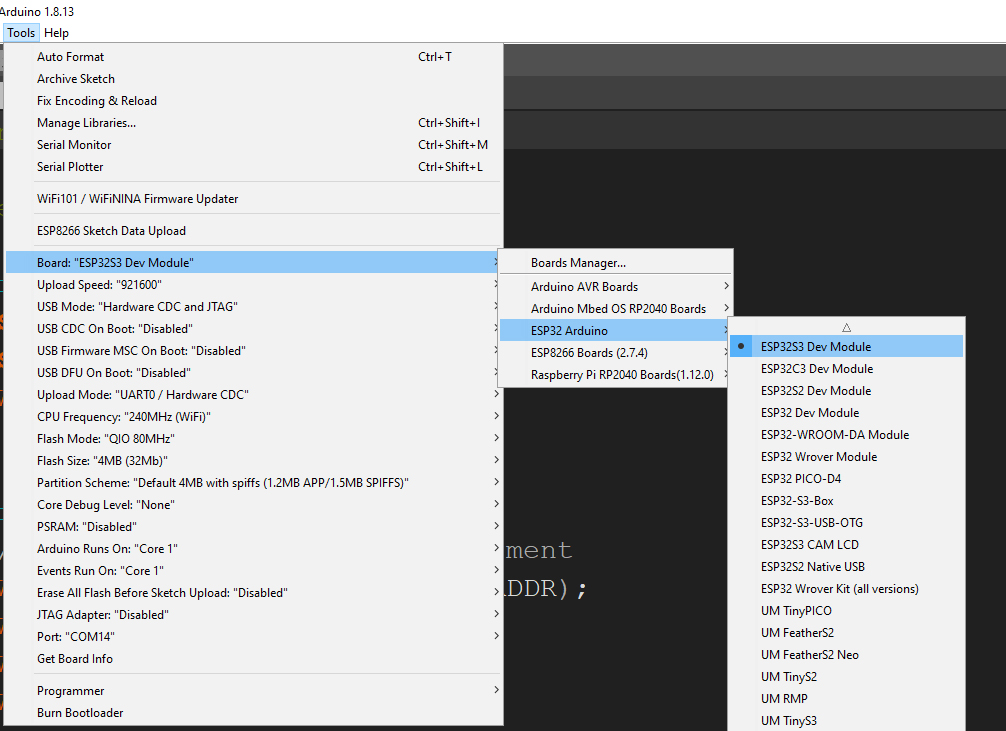
Now you can select the ESP32S3 Dev Module under the ESP Arduino category.

Step 3: Uploading code
Now that we have everything set up, we can upload some code to verify everything is working.
Copy and paste the code into the IDE and click the upload button. The Arduino IDE will compile and upload the code.
Make sure you have selected the correct serial port via Tools > Port.
/* Some example code to test on the ESP32-S3.
* It prints out "Hello world" every second via the serial monitor.
* Written by fishychair 17/8/2023
*/

// the setup function runs once during startup
void setup() {
  Serial.begin(115200);            // initialize serial port
}

// the loop function runs over and over again forever
void loop() {
  Serial.println("Hello world");   // Print to the serial monitor
  delay(1000);                     // wait 1000 milliseconds
}
After a successful upload, you should see "Hello world" being printed once a second in the serial monitor. You should also see the green TX LED on the board pulsing.
What next?
Any Arduino tutorials you find on the internet can be used for this board as well. The only thing to be aware of is the different operating voltages.
Arduino operates by default on 5V while this ESP32-S3 development board operates only on 3.3V. If you want to use a sensor, just use the 3.3V to power it instead of 5V.